 Simple
ESP32 OTA: how updates work and when managed OTA helps
How ESP32 OTA writes, boots and confirms a new image, why rollback depends on that last step, and when a fleet needs more than a DIY update loop.
ESP32 over-the-air (OTA) updates let a device replace its own firmware while it’s running, instead of you plugging it into a computer and flashing it over USB.
The idea is simple once you see it. The running app writes the new firmware into a spare partition, tells the bootloader to try that partition next, and reboots. The new firmware then has to confirm that it’s healthy. If it doesn’t, the bootloader can put the old firmware back.
You can build all of this yourself with ESP-IDF or an Arduino library and a file on an HTTPS server. This post covers how it works, where it tends to go wrong, and the point at which a fleet needs more than that.
Why ESP32 OTA needs two app partitions
Safe OTA needs at least two app slots, usually called ota_0 and ota_1, plus a small OTA data partition that records which slot the bootloader should boot.
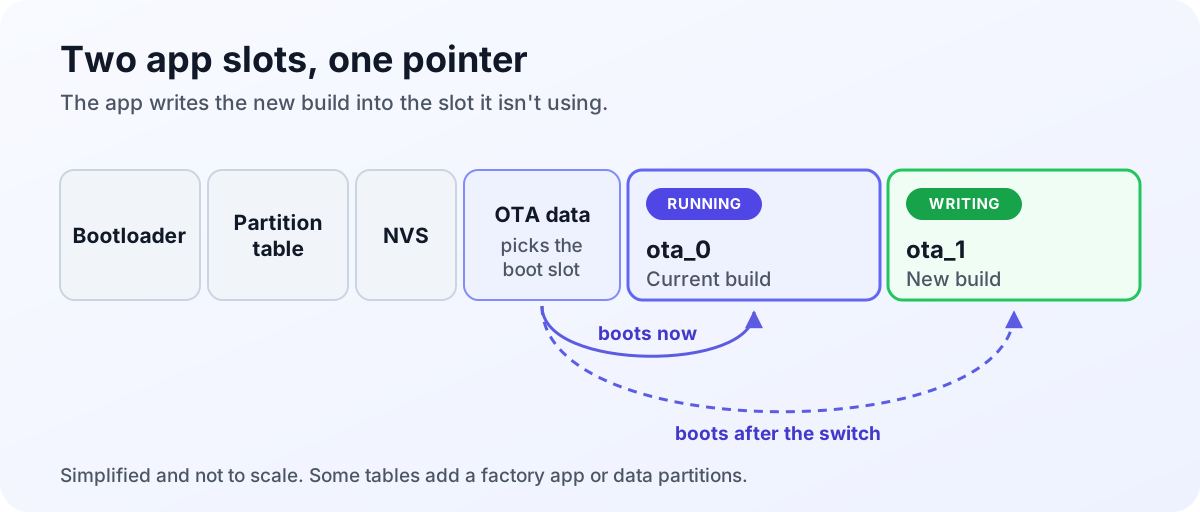
The running app always writes into the slot it isn’t using. That’s the whole point of the second slot: if the download dies halfway, or the new build won’t boot, the old firmware is still sitting untouched in its own partition. With a single app partition, a failed write would leave the device with nothing to boot.
Layouts with a factory partition or extra slots exist, and they follow the same rule: never overwrite the image you’re running.
Check, download, switch, confirm
An internet OTA update goes through four steps.
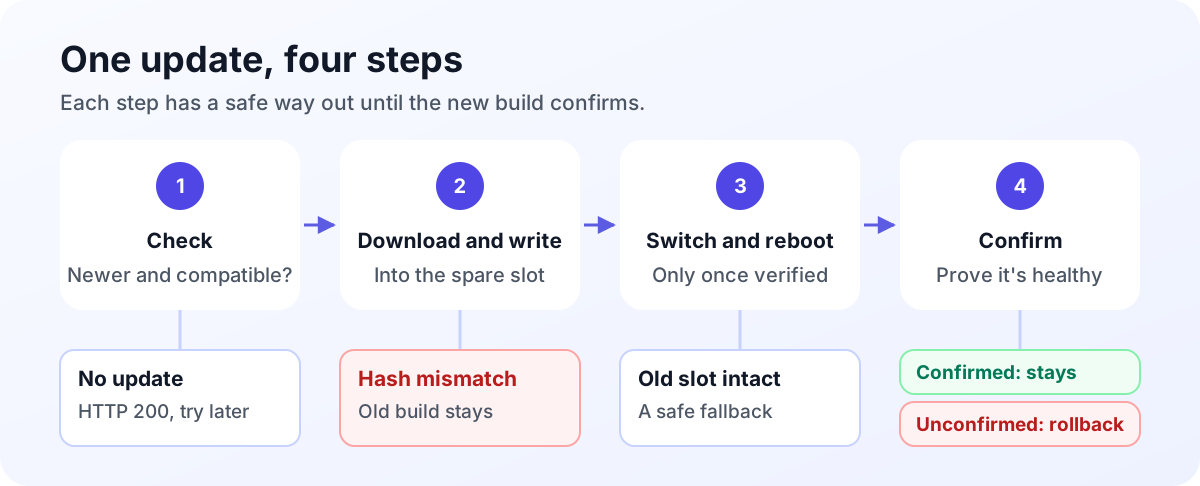
Check. The device asks a server whether there’s a newer build for its hardware. Most of the time the answer is no, and that “no” should come back as a normal successful response (HTTP 200) with a status such as up to date or not eligible. Save HTTP errors for real failures. If your server answers “nothing new” with an error code, every device treats it as an outage and retries, and you’ve built a fleet that hammers your server whenever there’s nothing to install.
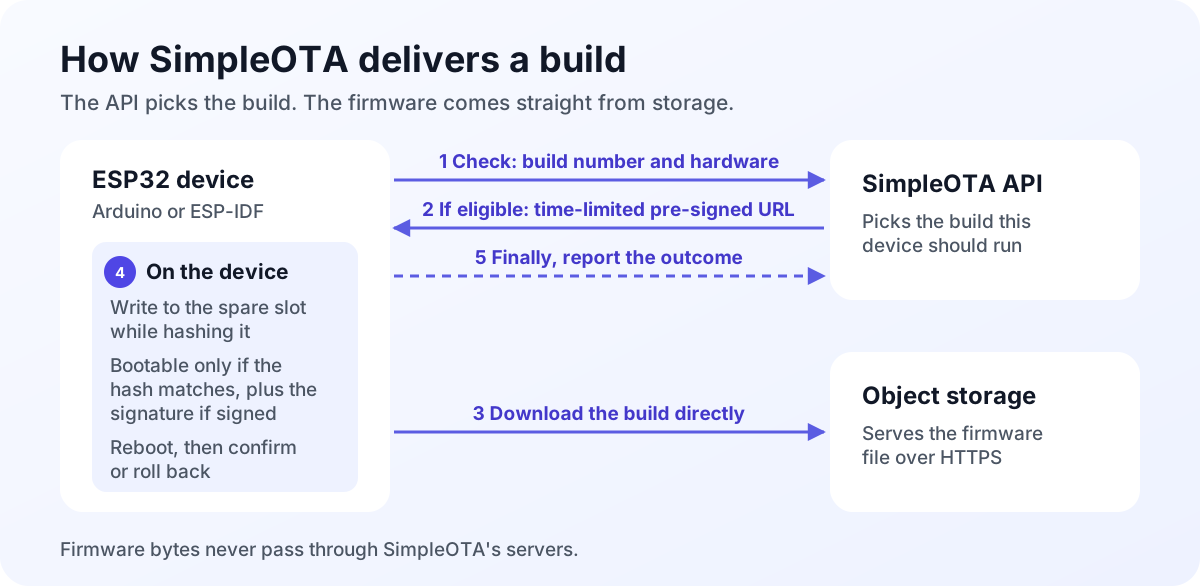
Download and write. The device downloads the binary over HTTPS and streams it straight into the spare partition as it arrives, so the whole image never has to fit in RAM. It hashes the bytes as it writes them, and when the download finishes it compares that hash with the one the server sent. If they don’t match, the device abandons the update and the old firmware keeps running.
Switch and reboot. Only once the image checks out does the device update the OTA data to point at the new slot and restart. The bootloader then loads the new firmware.
Confirm or roll back. With bootloader rollback enabled, the new firmware boots in a pending state rather than as trusted. It has two jobs. First it decides whether it’s healthy, for example by connecting to the network or running a self-test. Then it tells the bootloader so, by calling the framework’s confirm API (esp_ota_mark_app_valid_cancel_rollback() in ESP-IDF). An image that’s marked valid stays. One that never is gets replaced by the previous slot on the next reboot.
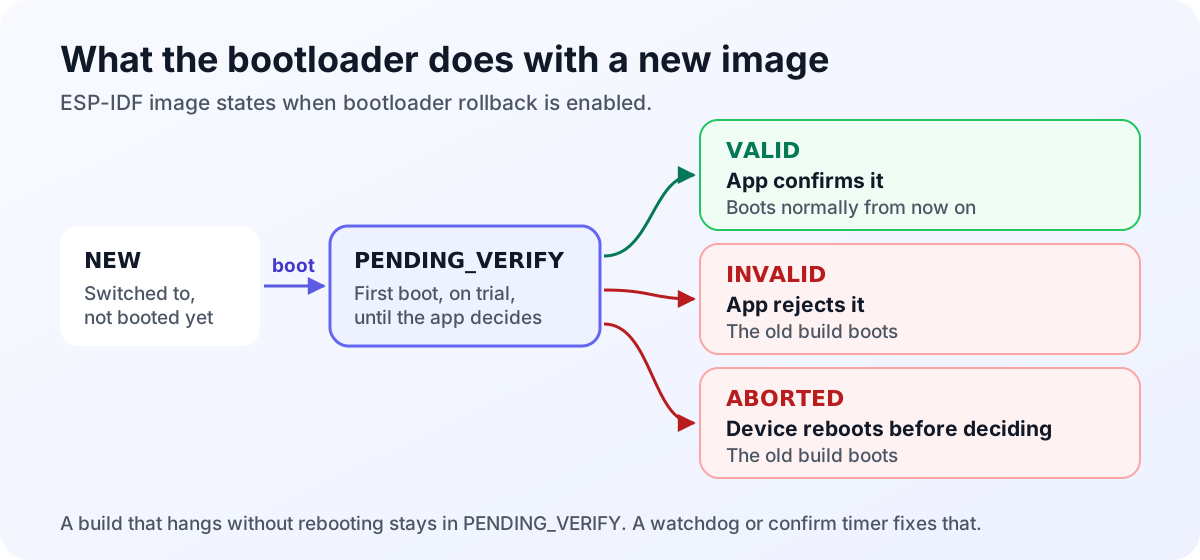
That last part has a catch: something has to cause the reboot. Firmware that hangs without crashing just sits there on the bad image. A task watchdog, or a timer that reboots the device if confirmation hasn’t happened within a few minutes, closes that gap.
ESP-IDF documents this flow in its OTA and HTTPS OTA APIs. Arduino-ESP32 provides much the same through its HTTP update helpers, or through a client library.
ArduinoOTA works on your desk, not in the field
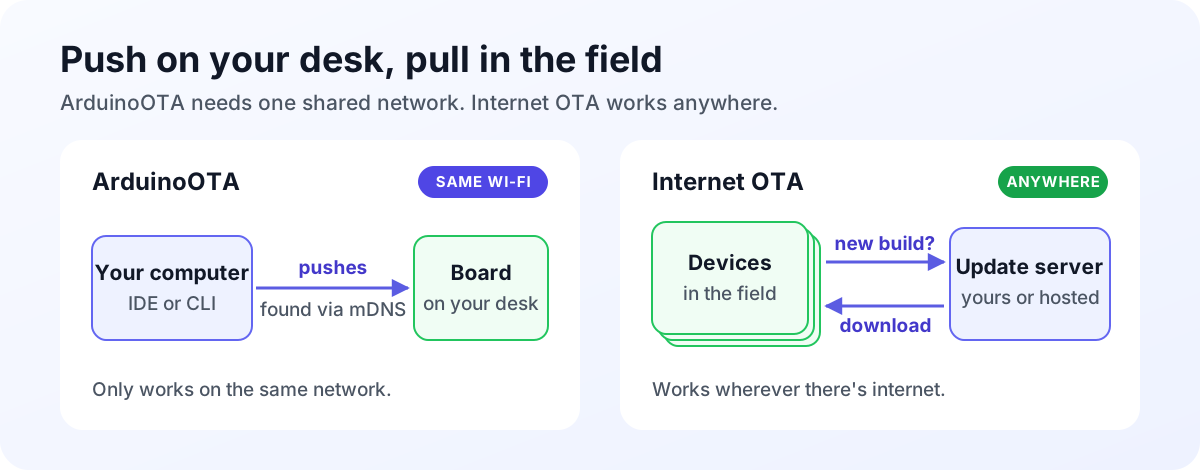
ArduinoOTA (the ArduinoOTA.h library in the ESP32 Arduino core) lets your computer push a new sketch to a board on the same Wi-Fi network, usually finding it with mDNS. It’s a good fit on the bench, where your laptop and the board share a network.
It can’t reach a device over the internet, it doesn’t know which build each device in the field is running, and it can’t roll a release out to 10% of a fleet. Once devices leave your network, your computer can no longer push to them, so each device has to fetch its own updates.
For a side-by-side look, see the ArduinoOTA vs managed fleet OTA comparison.
When managed OTA starts to pay off
One prototype that downloads a .bin from a fixed URL is fine on a DIY loop. It gets harder with a few hundred devices across two hardware revisions, when you want to try a release on a handful first, stop it if something breaks, and see which devices actually took it. That’s what a control plane is for: deciding which devices get which build, pausing a bad release, and showing which devices confirmed, failed or rolled back.
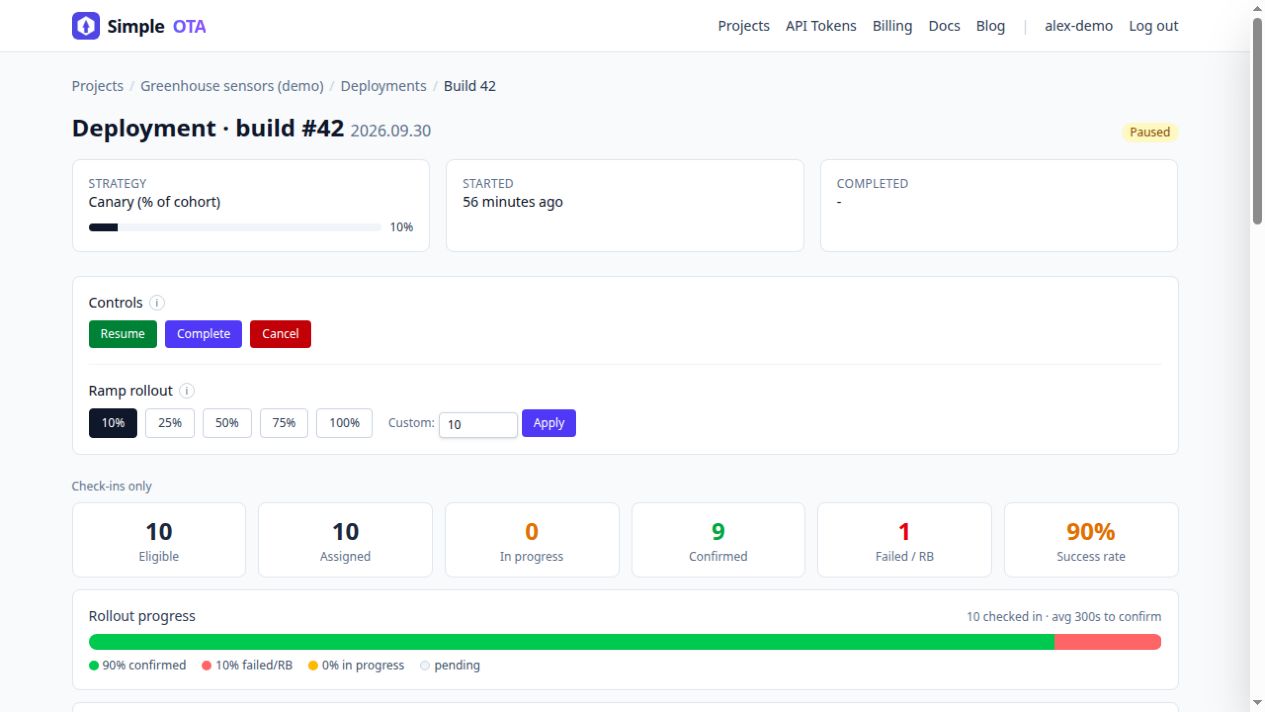
SimpleOTA is a hosted control plane for ESP32 fleets, with clients for both Arduino and ESP-IDF. Devices poll a check API with their build number and hardware details, and the ones that should update get a time-limited pre-signed URL to download the build directly from storage. They write it into the spare partition while hashing it, and only mark it bootable if the SHA-256 matches. With signing turned on, they also verify the signature before the image can boot. You aim each deployment at device groups, release channels, or both, and choose what percentage of that audience gets it. If a new image doesn’t confirm it’s healthy in time, the device rolls back on its own.
SimpleOTA does firmware updates and nothing else: there are no MQTT device shadows and no remote shell.
Signing your OTA updates isn’t the same as ESP32 Secure Boot. A signature check during OTA stops a device from installing a tampered update. Secure Boot stops it from running unsigned firmware at all, including firmware flashed by someone with physical access to the board. If that’s part of your threat model, you want both.
Where to go next
If you’re on Arduino, start with the complete Arduino guide and the Arduino wiki guide. On ESP-IDF, the ESP-IDF component guide and the ESP-IDF wiki guide cover the same ground.
To ship releases from CI, see GitHub Actions with Arduino CLI. To roll a release out gradually, read staged firmware rollouts. The wiki has the details on trial installs and rollback and signed firmware.
If you only came for the mechanics, the partition and confirmation flow above is all of it. If you also want canary releases, a record of which build each device runs, and signed updates without hosting your own update server, that’s the gap SimpleOTA fills.